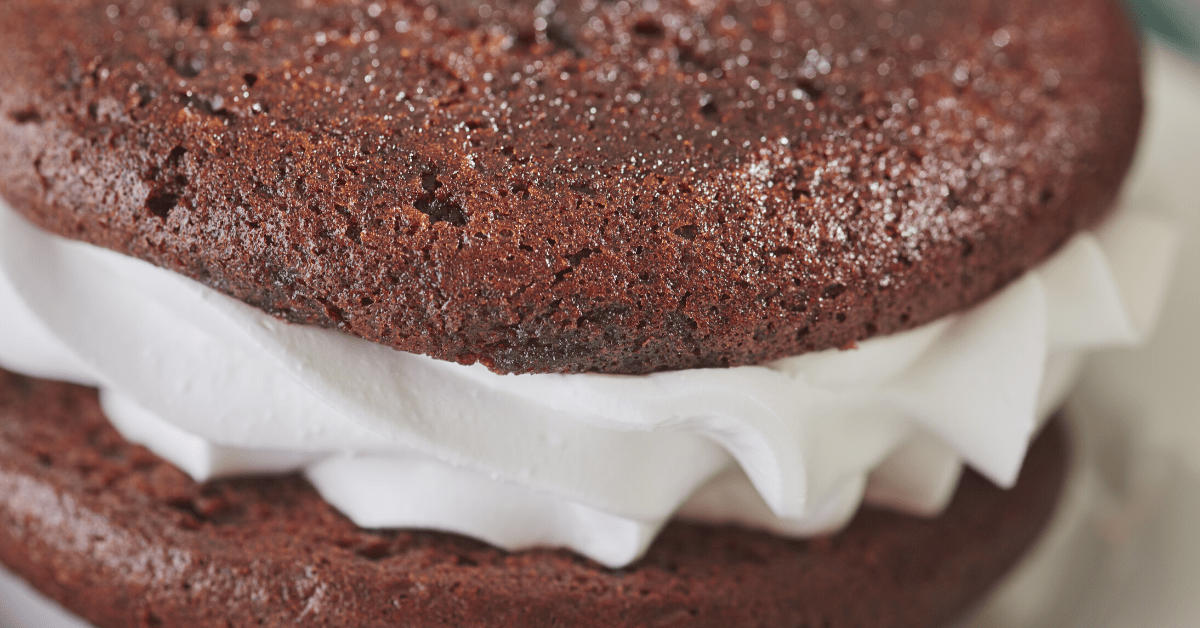
These Old-Fashioned Whoopie pies are soft, chocolaty sandwiches with a sweet fluffy filling. They’re the perfect combination between a cake and a cookie. So you get the best of both worlds!
For those of you who had these tasty treats as a kid… now you can make them in your kitchen with this step-by-step recipe. There’s something about Whoopie Pies that never get old. Even as an adult they still make me smile.

What is a Whoopie Pie?
A whoopie pie is a sandwich composed of two round cookies and a sweet, creamy, and fluffy white filling. The cookies are so soft and moist that they’re almost cake-like consistency-wise. If you think about it, a whoopie cake is like an inside-out cupcake, with the frosting found in the center, instead of the top. But, whether it’s a cookie, cake, or pie, who cares? All that matters is it’s delicious!
While the classic whoopie pie is made of chocolate cookies and marshmallow filling, lots of variations came to be over the decades. It is not uncommon to find these treats in pumpkin, vanilla, peanut butter, and even red velvet.
Why do they call it a Whoopie Pie?
Amish legend says that the adorable name came from how kids reacted to seeing the delicious cookie sandwich. Whenever kids found them in their lunch box, they’d shout “Whoopie!”. And the name still rings true today.
When you bite into one of these pies, I think you’ll share the same feeling.
Where did they come from?
The origin of the whoopie pie has some conflicting stories, with both New England and Pennsylvania claiming to have invented the delicious dessert. Let’s look at both origin stories, shall we?
Whoopie pies are a much-loved comfort food. Over in Maine, they make big whoopie pies. So they’re more like a cake than a cookie. They’re big enough for sharing and often served with a glass of milk. In fact, they became so popular that Maine dubbed it as the state’s official treat.
So, how did whoopie pie become so popular in New England? The answer lies in the invention of Marshmallow Fluff in 1917. It was first created by Archibald Query from Sommerville, Massachusetts pre-WWI. He then sold his business to Durkee and Mower, who first sold the product in 1920 in New Hampshire.
The whoopie pie rose to fame in New England when Durkee-Mower released a cookbook aptly called “Yummy Book”. It featured recipes that can be made using Marshmallow Fluff. As you may have guessed, the recipe for the whoopie pie was included in the cookbook.
However, some claim that the whoopie pie did not originate in New England, at all. Rather, they say it was Pennsylvania who came up with the cookie sandwich. As a way to maximize leftovers, the Amish experimented on leftover batter and ended up with this delicious treat.
In western Pennsylvania, the whoopie pie is more commonly known as “gob”. The term was coined by Tim Yost, the owner of Dutch Maid Bakery.
Others also say that the origin of the snack can be traced back to medieval Germany and was then brought to the United States by the German or Amish Brethren.
But, regardless of where the whoopie pie came from, one thing is for sure: these chocolate cookie sandwiches are darn delicious!
How to Make Whoopie Pie
Apart from being fun to say, a whoopie pie is also fun to make. Here’s how:
- Preheat the oven to 400 degrees F. Grease 2 cookie sheets.
- To make the cookie, add white sugar and shortening in a bowl and mix until fluffy. Beat in the eggs one at a time. Stir in sour milk and vanilla.
- Combine the cocoa, flour, and salt. Pour into the batter and mix well.
- In a separate bowl, add baking soda and hot water and mix until dissolved. Add the mixture into the batter.
- Scoop tablespoonfuls of batter onto the greased cookie sheet.
- Bake at 400 degrees Fahrenheit for 8 minutes or until firm. Do not overbake.
- Let cookies cool for a few minutes and then transfer to a wire rack. Allow cookies to cool completely.
- For the filling, combine shortening, sugar, and flour in a bowl. Mix together until light and fluffy.
- Gradually beat in the milk and vanilla and mix well. Fold in the egg whites.
- When your cookies have cooled completely, sandwich a tablespoon (or more) of filling between two cookies.
- Celebrate, because whoopie, you’re done!
Tips & Tricks For Making the Best Whoopie Pies
- No sour milk? No problem! You can substitute it with a cup of milk mixed with a teaspoon of vinegar.
- If you don’t want you filling to be too sweet, add a bit of softened cream cheese to the mix!
- If you are an extreme sweet-tooth, why not add chocolate chips to the filling?
- If you want more spice, you can add a bit of cinnamon and all-spice to the whoopie pie filling.
- While it is tempting to eat your whoopie pies right after cooking, try to wait a little longer. Trust me, they taste so much better when chilled! Refrigerate overnight for best results. Some even prefer them frozen!
- If you don’t have shortening on hand, you can use butter and a half teaspoon of baking powder instead.
- While you can use a spoon to scoop the batter, it is better to use an ice cream or cookie scoop. This way you’ll end up with uniform-sized cookies.
- You may also use a whoopie pie pan to make shaping the cookies easier. However, if you’re used to baking cookies, a regular baking pan will do.
- Instead of making the filling, you can just use Marshmallow Fluff instead. Another alternative is Marshmallow Creme, if you want a thinner consistency.
- Want a nice coffee kick to your cookie sandwich? Add three tablespoons of espresso powder for that delicious mocha flavor.
- For a more depth of flavor, use brown instead of white sugar.
- Stick with cocoa powder and don’t use chocolate when making the cookies. Real chocolate makes the cookies too moist and fudgy, and we don’t want that for this recipe.

