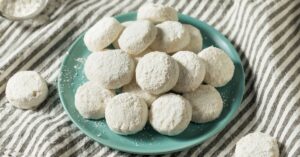
These Mexican wedding cookies are soft, sweet, rich, buttery, and amazing. If you haven’t tried them, now’s the time. One bite will make you fall in love!
These decadent cookies are crumbly melt-in-your-mouth treats. They’re sure to satisfy any craving.

Aside from the flavor and texture, their sheer beauty sets these cookies apart. Covered in powdered sugar, they look absolutely exquisite.
No wonder they’re popular during the holidays and other special occasions. But don’t worry; they’re a breeze to make. So you need not wait for someone’s wedding!
If you’re craving sweets, try these Mexican wedding cookies today!
Mexican Wedding Cookies
These buttery, crumbly cookies go by a thousand names.
It doesn’t matter if you call them Russian tea cakes, butterballs, snowballs, polvorones, or Mexican wedding cookies. They taste just as magical.
They’re round shortbread cookies that are so phenomenal they’ll make your jaw drop.
Their texture is perfect. They practically melt in your mouth. And the flavor? Oh, my God.
They’re ultra-rich and buttery, with a wonderful crunchy contrast from the walnuts.
Their snowy exterior adds to their charm. Plus, it provides the perfect amount of sweetness. And the best part? They’re effortless to make.
There’s no need to wait for Christmas or a wedding! With such basic ingredients and a simple recipe, you can enjoy these holiday-worthy confections anytime!
Ingredients
Here are the ingredients you’ll need:
- Butter – Some recipes call for softened butter, but I find cold butter better. It prevents the batter from spreading as it bakes. Remove the butter from the fridge 10 minutes prior to baking.
- Sugar – Since the cookies will be double-coated in powdered sugar, you’ll only need half a cup for the dough.
- Vanilla Extract – For flavor enhancement.
- All-Purpose Flour – Sift it to avoid a lumpy dough.
- Almonds – Chop them very finely to prevent the dough from falling apart during baking.
- Powdered Sugar – To achieve that beautiful snowy coating.
How to Make Mexican Wedding Cookies
Making these cookies isn’t difficult. Simply follow these steps:
1. Combine the butter and sugar. Mix the two in a medium bowl, beating them with an electric mixer on medium.
Continue beating the mixture for 1-2 minutes or until it’s soft and fluffy.
2. Add the vanilla and water. Mix them in gently until they’re just barely combined.
3. Add the flour and nuts. Sift in the flour, then pour in the almonds. Continue to beat the mixture with the electric mixer on medium-high speed.
4. Chill. Cover the bowl with the batter with plastic wrap. Place it in the fridge for 1 hour.
5. Preheat. Preheat the oven to 325 degrees Fahrenheit.
6. Shape and bake. Shape the chilled dough into small balls (or crescents, if you prefer).
Then, transfer them to a cookie sheet and bake for 15 to 20 minutes.
7. Coat in sugar. Remove the cookies from the oven and the baking sheet. Let them cool for about 5 minutes or until they’re cool enough to touch.
Then, roll the cookies in the powdered sugar to thoroughly coat them. Set them aside to let them cool.
8. Roll once more, then enjoy! After the cookies have fully cooled, roll them in the powdered sugar a couple more times.
Then, serve and enjoy!
Tips for the Best Cookies
- Save time with a mixer. Use a stand mixer or electric mixer to beat the ingredients together. The dough is very thick and stiff, so hand mixing won’t work.
- Sift the powdered sugar. This will help you avoid clumps.
- Use a cookie scoop. This will let you form uniform balls. Do not go beyond one inch per cookie, otherwise, they won’t bake fully.
- Use cold butter. Using cold butter will help avoid spreading. Remove the butter from the fridge 10 minutes before use.
- Don’t grease the cookie sheets prior to baking. Doing so will cause the cookies to spread. I highly recommend silicone baking sheets or parchment paper-lined sheets for this recipe.
- Chill the cookies before baking. Chilling them in the fridge for 30 minutes before baking will also prevent spreading.
- Don’t overbake! They’re not supposed to look golden brown. Bake them for just 11 to 13 minutes or until they’re slightly firm.
- Double coat the cookies with powdered sugar. Do the first coating about 5 minutes into cooling the cookies. Some of the sugar will melt due to the heat, which is why you need a second coating. Roll them in powdered sugar again once they have completely cooled.

Other Mix-ins for Mexican Wedding Cookies
- Use whatever nuts you like best. Mexican wedding cookies are traditionally loaded with either pecans or almonds. This recipe calls for chopped walnuts instead. Feel free to choose whichever you prefer. Macadamias and hazelnuts are other good options.
- Leave out the nuts. If nuts aren’t your thing, that’s okay. You can still make the cookies without them.
- Add mini-chocolate chips. You could also stuff the center of each ball with a mini-Hershey’s Kiss or Reese’s. Yum!
- Add chopped peppermint. Give your holiday cookies an even more Christmas-y vibe by adding chopped peppermint chunks to the dough.
- Make them fall-friendly. Infuse the dough with cinnamon or pumpkin pie spice.
How to Store the Cookies
Store Mexican wedding cookies in an airtight container at room temperature for 3 to 5 days.
You can keep them in the fridge for up to a week, but let them sit at the countertop for several minutes before serving.
These cookies taste best at room temperature.
Can You Freeze Mexican Wedding Cookies?
For a longer shelf-life, you can freeze the cookies for up to 3 months. Simply defrost them at room temperature until soft before serving.
You can also freeze the cookies prior to baking them. Here’s how:
- Follow the recipe instructions to make the dough.
- Place the shaped balls in a single layer on a baking sheet.
- Flash-freeze them for 2 to 3 hours.
- Transfer the balls into a freezer-safe bag, squeezing out as much excess air as you can before sealing it.
You can bake the cookies straight from the freezer; just add a minute to the original baking time.
More Cookie Recipes
- Soft and Chewy Lemon Cookies
- Italian Wedding Cookies
- White Chocolate Chip Cookies
- Refrigerator Cookies
